
Ever stood over a bench, feeling the dull thud of a blade that just won't bite, and thought, "There has to be a better way?"
You're not alone. Most knifemakers—whether you grind in a cramped garage or a full‑size workshop—have wrestled with that same frustration. A belt sander for knife sharpening can turn that grumbling experience into a smooth, confident slice.
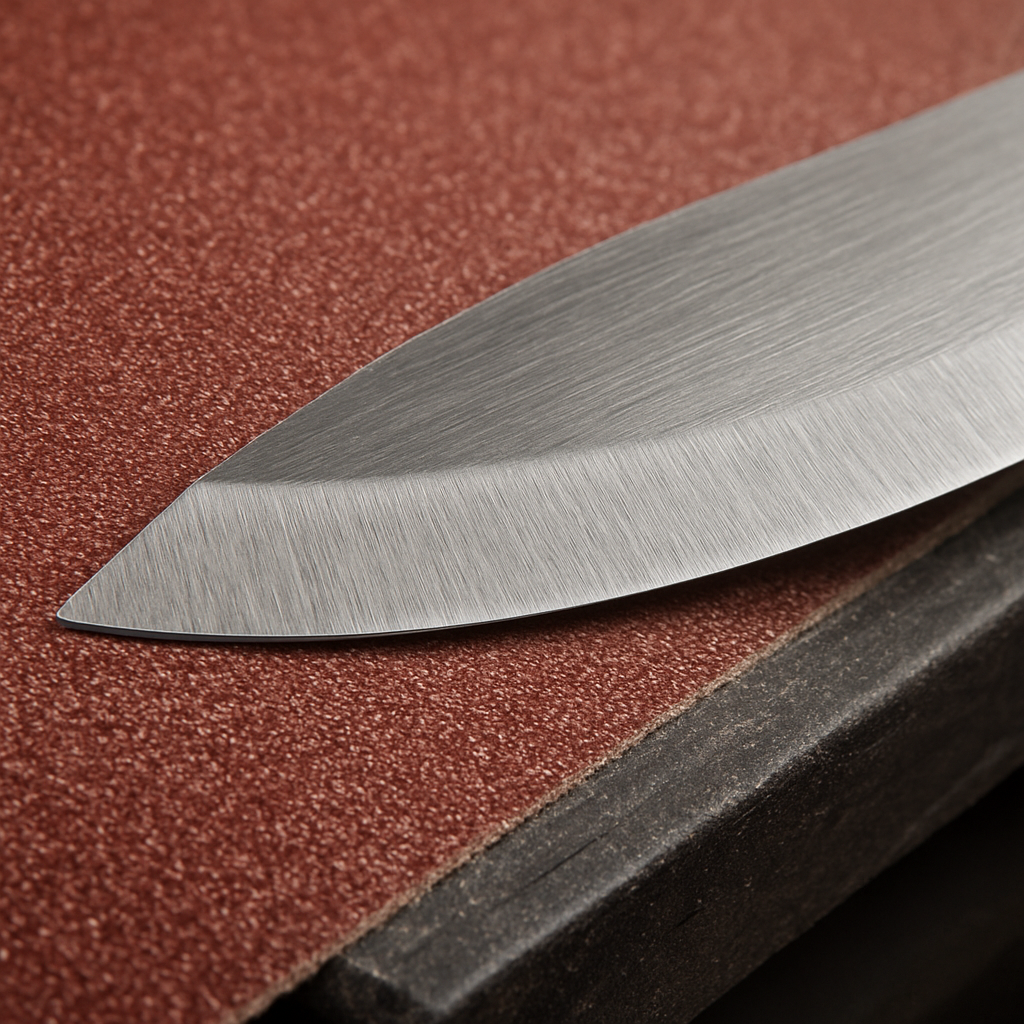
Think about the first time you tried to sharpen a chef's knife with a cheap handheld sander. The belt screamed, the blade jumped, and you probably ended up with an uneven edge that felt more like a saw than a slice. That's because a proper belt grinder gives you control over speed, pressure, and consistency—all the variables that make a razor‑sharp edge possible.
So, why does a belt sander feel different from a traditional stone? The belt runs continuously, letting you move the blade at a steady pace without the chatter of a rotating wheel. You can swap abrasive belts in seconds, switching from coarse to fine grit as you progress from beveling to polishing. And because the belt is flat, you can set the blade at any angle you like, whether you're working on a flat grind, a hollow grind, or a delicate chisel edge.
But here's the kicker: not every belt grinder is built for knives. You need the right motor size, the right belt speed, and the right contact wheel to avoid overheating the steel. That's where Diktator Grinders' expertise shines. Their 2x72 belt grinder kits pair a robust motor with a VFD that lets you dial in the perfect RPM for blade steel—whether you're sharpening a pocket knife or a massive hunting axe.
Still wondering how to pick the sweet spot? 1 HP vs 2 HP VFD Grinding: Which One Is Right for You? breaks down the power choices and shows why a variable speed drive matters for knife work.
In the next sections we'll walk through setting up your belt sander, choosing the right grit progression, and mastering the technique that gives you that coveted mirror finish. Grab a cup of coffee, and let's get those blades singing again.
TL;DR
A belt sander for knife sharpening lets you swap grits in seconds, dial the RPM with a VFD, and shape blade angle without overheating the steel.
Follow our guide to set up grinder, choose the right grit progression, and achieve a mirror finish that turns dull cuts into smooth slices.
Step 1: Choose the Right Belt Grit for Knife Sharpening
Ever stared at a dull chef’s knife and wondered if you’re using the right grit, or just the wrong belt? That moment of “maybe I’m grinding the wrong size” is more common than you think, especially when you first hook a belt sander up for knife sharpening.
Here’s the thing: the grit you pick sets the whole tone for the edge. Too coarse, and you’ll carve out a jagged bevel that overheats the steel. Too fine, and you’ll spend ages polishing a blade that never gets past the initial stock removal. Let’s break it down so you can pick the sweet spot every time.
What the grit numbers really mean
Grit is measured on the FEPA scale – the lower the number, the coarser the abrasive. A 24‑grit belt will eat metal like a hungry beaver, while a 400‑grit belt is more like a gentle sandpaper, perfect for polishing.
Most knife makers start with something in the 24‑120 range for shaping, then move up to 180‑400 for honing the edge. If you’re working on a high‑carbon steel that’s already close to the final geometry, you might even begin at 80 grit and skip the super‑coarse steps.
Why ceramic belts are a game‑changer
If you’ve ever tried aluminum‑oxide belts, you know they can heat up fast and wear out quickly. EdgeCore ceramic sanding belts stay cooler, cut faster, and last longer – exactly what you want when you’re using a belt sander for knife sharpening.
They’re built with a heat‑reducing stearate layer, so the steel stays under the temperature threshold that could temper your edge. That means you can stay in the “stock removal” zone a little longer without worrying about losing hardness.
Step‑by‑step grit progression
1. Coarse start (24‑36 grit) – Use this only if you have a lot of material to remove, like forging scale or a badly miss‑honed bevel. Keep the belt speed moderate and feed the blade gently.
2. Medium grind (60‑80 grit) – This is your workhorse for shaping the primary bevel angle. You’ll start seeing a consistent bevel width across the blade.
3. Fine refine (120‑180 grit) – Here you smooth out the transition between the bevel and the rest of the blade. The edge begins to look like a gentle curve rather than a stair‑step.
4. Honing & polishing (240‑400 grit) – Finish with a flexible ceramic belt or a high‑grade aluminum‑oxide belt if you prefer a mirror finish. Light pressure, slower belt speed, and a steady hand will give you that razor‑sharp edge.
And remember: every time you change grit, give the belt a quick wipe to remove metal dust. It helps maintain consistent cutting action and prevents the belt from loading up.
So, what should you do next? Grab a set of EdgeCore belts, start at 60 grit, and watch how quickly the blade takes shape. If the steel feels hot, dial back the RPM or switch to a finer belt sooner.
That quick video walks through the exact belt changes on a 2x72 grinder, so you can see the visual difference between a 60‑grit cut and a 240‑grit polish.
Once you’ve dialed in the right progression, the next step is all about angle control – but that’s a story for the following section.
Step 2: Set Up Your Belt Sander Safely
Before you even think about feeding a blade over the belt, you need a solid, safe foundation. A sloppy setup is the fastest way to ruin a knife—or worse, injure yourself.
First thing’s first: clear a workspace that’s at least three feet wide and two feet deep. You want room to swing the blade, to reach the belt, and to step back if something spins out of control. A sturdy workbench with a flat surface is ideal; a wobbling table will transmit vibration to the grinder and make the edge uneven.
Power and Grounding
Plug the sander into a dedicated 110 V circuit with a grounded outlet. Resist the urge to use extension cords; they can introduce voltage drop and increase the chance of a short. If your shop has older wiring, double‑check that the outlet is GFCI‑protected—especially if you’re working in a damp environment.
Once it’s plugged in, flip the main power switch on the grinder (if it has one) before you engage the belt. Many 2×72 kits have a separate emergency stop button; keep your finger near it so you can kill the machine in a split second.
Mounting the Belt and Contact Wheel
Lay the belt flat on the rollers, making sure the grit side faces outward. Align the belt so the teeth of the drive roller sit in the groove—not the flat spot. A common mistake is to tension the belt too tight; you’ll hear a high‑pitched squeal and the rollers will wear out faster.
Here’s a quick checklist:
- Check belt alignment by eye; the belt should run straight without wobbling.
- Adjust the tension knob until the belt has a slight give—about a quarter‑inch deflection when you press it with your thumb.
- Spin the belt by hand; it should move smoothly without catching.
If the belt jumps, loosen the tension and re‑center it. A well‑tensioned belt not only lasts longer but also reduces heat buildup on the steel.
Choosing the Right Contact Wheel
For knife sharpening, a 4‑inch aluminum or steel contact wheel works well. Aluminum stays cooler, which helps prevent the blade from overheating during the coarse grind. Steel wheels, on the other hand, give you a bit more rigidity for the final polishing stage.
Mount the wheel on the spindle, tighten the set screw, and give it a spin. You should feel a subtle vibration but no grinding noise. If the wheel wobbles, re‑tighten the mount or check that the spindle bore matches the wheel’s hub.
Safety Gear and Personal Prep
Now that the machine is ready, suit up. A pair of ANSI‑approved safety glasses protects your eyes from metal fragments. A dust mask or respirator is a good idea if you’re grinding stainless steel, which can release fine silica particles. And don’t forget hearing protection—belt grinders can hit 70 dB or louder.
Wear snug‑fitting gloves, but avoid loose sleeves that could get caught. Many knifemakers prefer a thin leather glove on the hand that guides the blade; it gives tactile feedback while still shielding against sparks.
Zero‑In on the Blade Position
Place the blade on a sturdy, non‑conductive support—like a wooden jig or a metal clamp with a rubber pad. The blade should be held at the desired bevel angle, usually 15‑20° for a chef’s knife. Use a protractor or a digital angle guide to verify the angle before you start.
Turn the belt on at the lowest RPM first; you can always dial it up later. Watch the belt’s surface—if it starts to turn blue, you’re overheating and need to back off the speed or add a cooling break.
Test Run Before the Real Deal
Do a quick “air cut” with a scrap piece of steel or a cheap kitchen knife. Lightly touch the belt and feel how the blade feeds. If the blade jumps or the belt pulls unevenly, pause and readjust the tension or angle.
Once the test feels smooth, you’re ready to move on to the actual blade. Remember: the goal is a controlled, consistent feed—not a race to the finish line.
By taking the time to set up your belt sander safely, you protect both your knives and yourself, and you lay the groundwork for that razor‑sharp edge you’re after.
Step 3: Prepare the Knife Blade
Now that your grinder is humming safely, it’s time to give the blade the respect it deserves before you feed it into the belt sander for knife sharpening.
Clean off the old rust and residue
Grab a soft brass brush or a piece of fine steel wool and sweep away any scale, rust, or leftover oil. You don’t need to go overboard—just enough to see the metal’s true color. A clean surface lets the abrasive bite evenly and prevents gritty debris from scratching the fresh edge.
Do you ever notice a weird “grind‑y” feeling halfway through a pass? That’s usually leftover grime acting like a tiny bumper. A quick wipe with a lint‑free cloth and a splash of mineral spirits will erase it.
Check the blade’s geometry
Before you set the blade on the jig, take a step back and look at the bevel. Is it still roughly 15‑20° for a chef’s knife? If the angle has drifted, you can lightly adjust it with a coarse belt before you get into the fine polishing stage.
Grab a digital angle guide or even a simple protractor. Place it against the flat side of the blade and read the angle. If you’re off by more than a degree, a quick pass on a 60‑grit belt will bring it back into line without removing too much material.
Secure the blade without crushing it
Here’s a trick many hobbyists overlook: use a thin, non‑conductive spacer—like a piece of hardwood or a polymer block—between the blade and the clamp. This spreads the clamping force and keeps the edge from getting a dent.
Position the blade so the cutting edge faces away from the belt, and the spine rests snugly against the support. Tighten the clamp just enough to stop any wobble; you should still feel a tiny bit of give when you press the blade gently.
And remember, the goal isn’t to lock the blade like a vise. Too much pressure will flatten the bevel and make the grinding process feel “stuck.”
Pre‑heat check—avoid thermal shock
Even though the belt sander runs at lower RPMs during preparation, the steel can still heat up fast if you linger. Give the blade a few seconds of air cooling after each pass, especially when you’re on the coarse side.
Do you hear that subtle “ping” as the steel expands? That’s your cue to step back, let the blade rest, and maybe splash a drop of water on the spine to bring the temperature down.
Mark your start and finish points
Use a piece of masking tape to mark where the bevel begins and where it ends. This visual guide helps you maintain a consistent feed length, especially if you’re switching between grit belts.
When you reach the tape line, ease off the pressure and let the belt glide off the edge. That little habit prevents you from accidentally over‑grinding the tip.
Do a quick “feel” test
Place a scrap piece of stainless steel on the belt, run the blade over it at a light angle, and listen for a smooth, even hum. If the blade catches or the belt skips, something’s still off—maybe the angle, tension, or the blade isn’t seated properly.
Adjust, re‑tighten, and try again. A few minutes of tweaking now saves you from a ruined edge later.
Final checklist before the real grind
- Blade clean and dry.
- Bevel angle verified (15‑20° typical).
- Clamp with a non‑metal spacer, no excess force.
- Temperature under control; short breaks built in.
- Markings in place for consistent feed.
- Air‑cut test passed.
Once every box is checked, you’re ready to move on to the actual sharpening passes. Remember, the more mindful you are in this prep stage, the smoother the belt sander for knife sharpening will behave, and the sharper your final edge will be.
Step 4: Sharpening Technique and Angle Control
Okay, you’ve got the blade clamped, the belt humming, and the tape marks in place. Now the real magic happens: turning those marks into a razor‑sharp edge. It all boils down to two things—how you move the knife and how steady your angle stays.
Set your angle once and forget it (ish)
Most of the frustration people feel is the blade slipping off the set bevel. That’s why a simple angle guide can be a lifesaver. The Knife Sharpening Angle Guide clips onto the platen and lets the belt move away from the blade while you keep the angle locked between 10° and 45°.
Once you tighten the knurled knob to, say, 18°, you’ll notice the blade stays flush against the guide even when the belt pulls. It’s not perfect—some users report a bit of drift—but it’s a huge step up from eyeballing the angle each pass.
Master the feed rate
Think of the belt like a treadmill for your blade. Too fast and you’ll carve a jagged groove; too slow and you’ll overheat the steel. A good rule of thumb is a gentle “push‑and‑release” motion: let the blade glide for a couple of seconds, lift just enough to reset, then repeat.
For the coarse 60‑grit stage, aim for a feed that removes a thin, even layer—roughly the thickness of a fingernail. When you switch to 180‑grit, slow the belt down and let the blade linger a hair longer. You’ll hear a smoother hum and feel less vibration.
Cool down before you burn out
Overheating is the silent enemy of a good edge. When steel gets past its tempering point, you lose hardness and the edge chips later. A quick dip in water or a few seconds of air‑cooling after every 10‑15 seconds of grinding keeps the metal in the sweet spot. The Dream of Japan team warns that “using a belt sander to sharpen your knife, you risk heating the steel and creating uneven spots of hardness” if you don’t watch the temperature (source).
Pro tip: place a small heat‑resistant silicone mat on the workbench. When the blade gets warm, set it on the mat and let the air do the rest. No need to stop the whole session—just a brief pause.
Check the edge as you go
Every few passes, do a quick burr test. Lightly run your thumb perpendicular to the edge; you should feel a tiny, consistent burr on the high side. If the burr is uneven, you’re either feeding too fast or the angle has drifted. Lightly roll the burr off with a fine‑grit ceramic belt or a leather strop.
Another cheap trick: hold a piece of paper at a 45° angle to the blade. If the blade slices cleanly, you’re on track. If it catches, back off the feed speed or tighten the angle guide.
Quick checklist before you finish
- Angle guide set and locked.
- Feed rhythm steady—push, release, repeat.
- Cool‑down pauses every 10‑15 seconds.
- Burr test passed, paper test clean.
- Final polish with 400‑grit or higher, light pressure.
| Technique | Angle Control Tool | Key Tip |
|---|---|---|
| Coarse grinding (60‑80 grit) | Adjustable angle guide (10‑25°) | Lock in 18°, feed slowly, pause for heat. |
| Refining (180‑240 grit) | Same guide, fine‑tune to 15‑20° | Reduce belt speed, keep feed smooth. |
| Polishing (400 grit+) | Guide optional – rely on visual cue | Use leather strop, no pressure, check for burr. |
When you walk away from the grinder and see that blade gleam back at you, you’ll know the effort paid off. Remember, the goal isn’t to race the belt; it’s to keep the angle steady, the feed gentle, and the steel cool. That’s the sweet spot for a belt sander for knife sharpening that actually delivers a razor‑sharp edge you can trust.
Step 5: Finishing, Honing, and Edge Testing
Now that the bevel is shaped and the belt has been run through the coarse and medium grits, it’s time to squeeze out every last micron of roughness and make sure the edge really holds up. This is where the “finishing, honing, and edge testing” stage separates a decent knife from a blade you’ll actually want to trust.
1. Switch to a fine‑grit ceramic belt (400 grit or higher)
Grab your 400‑grit or 600‑grit ceramic belt and lower the grinder’s RPM to a comfortable, low range – think 500–800 SFPM on a 2×72. The slower speed lets the steel stay cool while the finer abrasive smooths the microscopic teeth left by the 180‑240 grit belt.
Feed the blade with the same gentle push‑and‑release rhythm you used earlier. You’ll hear a higher‑pitched hum and feel the belt “kiss” the metal rather than grind it. Light pressure is key; you’re not removing material, you’re just polishing it.
And if you notice the belt starting to glow a faint blue, pause immediately – that’s a warning sign you’re heating the edge.
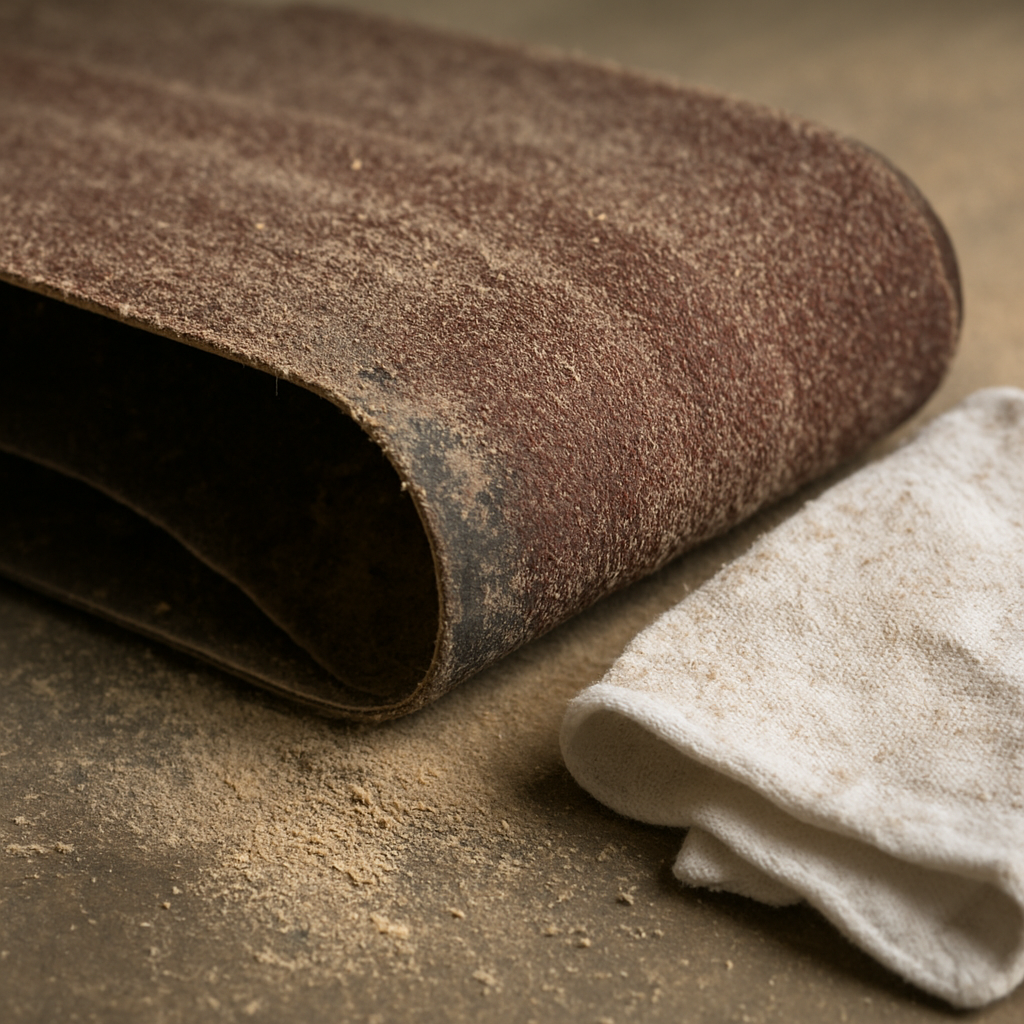
2. Roll off the burr with a leather strop or ceramic belt
When the fine belt finishes, a tiny burr will appear on the high side of the edge. Take a clean leather strop (or run a 120‑grit ceramic belt very lightly) and drag the blade across it, alternating sides.
This step removes the burr without introducing new heat, and it also gives the edge a subtle micro‑ bevel that makes everyday slicing feel smoother.
3. Edge testing – burr test, paper test, and a quick cut
First, run your thumb perpendicular to the edge. You should feel a consistent, almost invisible burr on the high side. If the burr feels jagged or missing, go back another pass on the 400‑grit belt.
Next, hold a piece of printer paper at a 45° angle and let the blade slide. A clean slice with no snag means the edge is razor‑sharp. If the paper catches, you’ve either missed a spot or the angle guide has drifted.
Finally, do a real‑world cut – slice through a tomato or a piece of soft cardboard. The blade should glide through with barely any pressure. This quick “cut test” tells you whether the edge will hold up in the kitchen, not just on a piece of paper.
4. Keep the edge cool – why it matters
Even short bursts of friction can push the apex of a knife past its tempering temperature, softening the very tip you just spent an hour grinding. Research shows that grinding can overheat the edge and reduce hardness, especially on high‑carbon steels.
To combat that, stick to the 10‑second pause rule: after every 10‑15 seconds of grinding, lift the blade, let it air‑cool, or dab a spray bottle with a mist of water. You don’t need a full water‑cooling system – a quick mist does the trick without ruining the belt.
5. Final polish with a 1000‑grit or higher ceramic belt (optional)
If you crave a mirror finish, swap in a 1000‑grit belt for a few light passes. The extra grit will remove the last microscopic scratches and give the edge that “just‑saw‑the‑light” sparkle.
Remember to keep the pressure feather‑light; at this stage you’re only polishing, not shaping.
6. Quick checklist before you call it a day
- Fine‑grit belt (400 grit+) in place, RPM low.
- Burr removed with strop or light ceramic pass.
- Burr test, paper test, and a real‑world cut all passed.
- Cooling pauses observed – no blue belt glow.
- Optional 1000‑grit polish applied, then wiped clean.
When you step back and see that blade reflecting the shop lights, you’ll know you’ve nailed the finishing stage. The edge should stay keen for dozens of cuts before it needs another light touch‑up, and you’ll have avoided the dreaded edge softening that can happen when a belt sander runs too hot.
Take a moment, clean the belt, and store your angle guide safely – tomorrow’s sharpening session will feel a lot smoother because you’ve respected the heat and the grit.
Step 6: Maintenance and Long‑Term Safety of Your Belt Sander
Now that your edge is humming and the final polish is in the bag, it’s time to think about the beast that made it happen – your belt sander for knife sharpening.
Because a grinder that’s ignored will turn into a heat‑monster or a belt‑taker‑out‑its‑life, let’s walk through the daily chores and the long‑term habits that keep it safe and sharp.
Clean the Belt Regularly
First thing’s first: the belt itself. After each session, wipe off metal dust with a clean lint‑free rag. A quick spray of light oil on the belt surface helps suspend any lingering grit, preventing it from loading up and grinding the steel unevenly.
If you notice the belt turning a faint gray or feeling sticky, give it a gentle brush with a soft horse‑hair brush. Avoid harsh solvents – they can eat the backing and cause premature cracks.
Inspect and Replace Worn Parts
Every 20‑30 hours of grinding, pull the contact wheel and give it a spin. Any wobble, nick, or loss of flatness is a sign it needs swapping. The same goes for the drive rollers; worn teeth will chatter and heat the belt faster than you’d like.
Don’t wait for a catastrophic belt snap. Keep a spare 4‑inch aluminum wheel and a set of rollers on hand – swapping them takes less than five minutes and saves you a painful downtime.
Keep the Motor Cool
Your motor loves a steady temperature. After a solid hour of work, shut it down for a minute and let the fans clear any built‑up heat. If you’re in a hot garage, consider a small portable exhaust fan aimed at the motor housing.
A quick check: the motor casing should be warm to the touch, not hot enough to make you wince. Consistently hot motors are a red flag for bearing wear or insufficient ventilation.
Lubrication and Belt Tension
The tension knob isn’t just a convenience; it’s a safety valve. Every few weeks, release the tension, spin the belt by hand, and re‑apply the recommended quarter‑inch deflection. Too tight and you’ll hear a high‑pitched squeal; too loose and the belt will jump off the rollers.
A drop of silicone grease on the roller shafts once a month keeps the bearings smooth and reduces noise. Skip the WD‑40 – it attracts dust and can slip the belt during a pass.
Safety Checklist for Every Session
Before you hit start, run through this quick mental list:
- Power cord is undamaged and firmly plugged into a grounded outlet.
- Emergency stop button is reachable.
- Safety glasses and hearing protection are on.
- Belt is clean, tension set, and no visible cracks.
- Cool‑down pause scheduled every 10‑15 seconds of grinding.
- Blade clamp is secure but not overtightened.
If any item looks off, pause the machine and fix it. A half‑minute of extra care beats a broken belt and a trip to the shop.
Storing Your Grinder
When the day is done, give the grinder a proper home. Cover the work area with a dust‑proof sheet, then drape a breathable canvas cover over the whole unit. Avoid stacking heavy boxes on the platen – the 36‑inch radius can warp under pressure.
Ideally, store the sander in a climate‑controlled space. Excess humidity can rust the wheel bore, while freezing temperatures make the belt brittle. A simple dehumidifier in the workshop does wonders.
By treating your belt sander for knife sharpening like a partner rather than a disposable tool, you’ll enjoy years of consistent performance, safer sessions, and edges that stay razor‑sharp. So, grab that rag, tighten that bolt, and give your grinder the love it deserves – your future knives will thank you.
Conclusion
We’ve walked through everything you need to turn a plain belt sander into a reliable belt sander for knife sharpening – from safety checks to grit progression and the final polish.
Remember that the biggest enemy is heat. A quick dip in water or a 10‑second air‑cool pause every time the belt starts to glow keeps the steel’s temper intact and saves you from a softened edge.
And don’t forget the little habits that add up: wipe the belt clean after each session, re‑check tension weekly, and store the grinder in a dry, climate‑controlled space. Those tiny steps protect your investment and keep your knives singing for years.
So, what’s the next move? Grab your set of ceramic belts, set the RPM with the Diktator VFD, and give that dull blade a fresh start. You’ll feel the difference the moment the steel slides smoothly across the belt.
In the end, a well‑maintained belt sander for knife sharpening isn’t just a tool – it’s a partner that lets you shape, refine, and polish with confidence. Treat it right, and your knives will thank you on every cut.
Keep experimenting, track your progress, and share tips with fellow makers – the community thrives when we all sharpen together.
FAQ
What makes a belt sander better than a whetstone for knife sharpening?
When you use a belt sander you get a consistent, repeatable grind that’s hard to achieve by hand on a stone. The moving abrasive removes material evenly, so the bevel stays uniform from tip to heel. It also speeds up the coarse‑to‑fine progression – you can go from stock removal to a polished edge in minutes instead of hours. For busy knifemakers or hobbyists who want fast results without sacrificing precision, the belt sander is a real time‑saver.
Do I really need a ceramic belt, or can I use aluminum‑oxide?
Ceramic belts stay cooler because they have a built‑in stearate layer that dissipates heat. That means less risk of tempering the steel when you linger on a coarse grit. Aluminum‑oxide works fine for occasional touch‑ups, but it heats up faster and wears out quicker. If you’re sharpening high‑carbon knives regularly, a ceramic belt will give you smoother cuts, longer belt life, and fewer temperature‑related headaches.
How often should I pause to cool the blade?
Every 10‑15 seconds of grinding is a good rule of thumb. When the belt starts to glow a faint blue or the blade feels warm to the touch, stop, let the steel air‑cool for a few seconds, or give it a quick dip in water. Those short breaks keep the edge’s hardness intact and prevent the dreaded softening that can turn a razor‑sharp blade into a dull one after just a few passes.
Can I use the same belt sander for both thick stock removal and fine polishing?
Absolutely – just swap belts in order of grit progression. Start with a coarse 60‑80 grit to shape the bevel, then move to 180‑240 grit for smoothing, and finish with a 400‑600 grit ceramic belt for that mirror‑like polish. The key is to keep the belt clean between changes and adjust the RPM lower as you get finer, because lower speeds reduce heat and give you more control.
What safety gear is non‑negotiable?
Never skip safety glasses – metal shards fly faster than you think. A good pair of ANSI‑approved glasses protects your eyes from sparks and dust. Hearing protection is also important; belt grinders can hit 70 dB or more. Finally, wear snug gloves on the hand that guides the blade; a thin leather glove gives you tactile feedback while shielding against accidental cuts.
How do I know if my belt tension is right?
Press the belt with your thumb; you should feel a slight give – about a quarter‑inch deflection. If it feels rock‑hard, the tension is too tight and you’ll hear a high‑pitched squeal, plus the belt will wear out faster. Too loose and the belt will jump off the rollers. A quick hand test and a spin‑by‑hand check before each session will keep tension spot‑on.
Is there a quick way to troubleshoot a blade that keeps slipping off the belt?
First, double‑check your angle guide – make sure it’s locked firmly at the desired bevel angle. Next, verify the blade’s surface is clean; a dusty or oily edge won’t bite the abrasive properly. Finally, adjust your feed pressure; too much force pushes the blade away, too little lets it ride the belt without enough contact. Small tweaks to angle, cleanliness, and pressure usually solve the slip problem within a minute.


